Overview
A template controls how your flowchart looks — the fill colors, border colors, and text colors of each shape type. Flowchart Maker comes with a set of built-in templates, but you may want to use your own brand or business colors instead.
The Create New Template utility lets you take any existing template as a starting point, change its colors to suit your needs, and save the result as a new template — all without leaving Excel or editing any files by hand.
Opening the Utility
On the Flowchart Maker ribbon tab, click New Template.
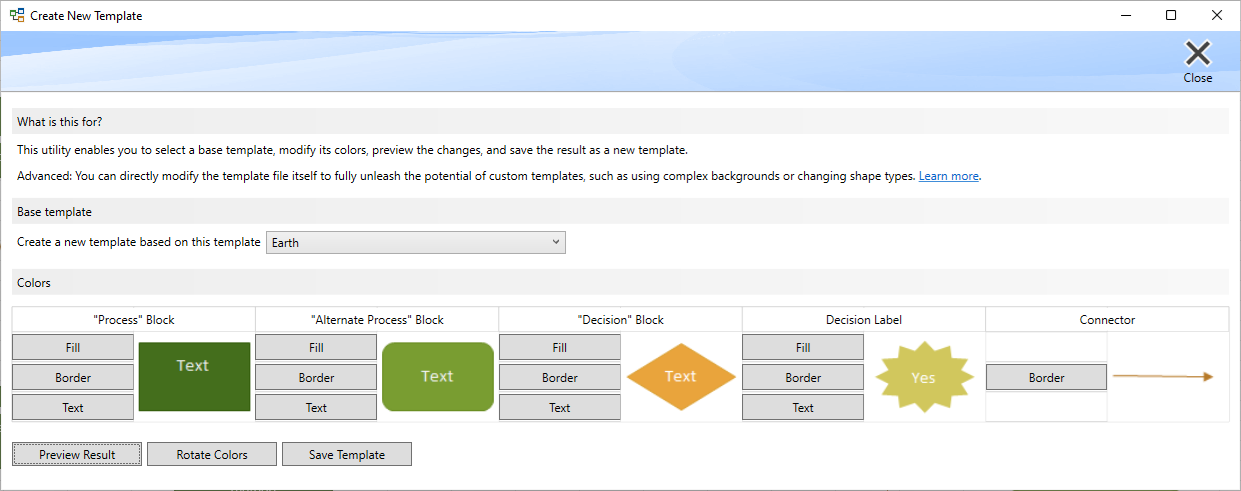
The Create New Template window opens.
Step 1 — Choose a Base Template
Under Base template, open the drop-down list and select the template you want to start from.
As soon as you select a template, the Colors section beneath it becomes active and displays a live preview of five shape categories drawn from that template:
| Shape category | What it represents |
|---|---|
| "Process" Block | Standard process or action steps (rectangles) |
| "Alternate Process" Block | Secondary or sub-process steps (rounded rectangles) |
| "Decision" Block | Decision diamonds (Yes / No branch points) |
| Decision Label | The small text labels attached to decision connectors (e.g. "Yes", "No") |
| Connector | The arrow lines that connect shapes |
Step 2 — Change the Colors
For each shape category, you can independently adjust up to three color properties. Click the corresponding button to open the standard Windows color picker:
- Fill Color: the background color inside the shape
- Border Color: the color of the shape's outline
- Text Color: the color of the text inside the shape
When you click a color button, the color picker opens pre-set to the shape's current color. Choose a new color and click OK. The preview image for that shape updates immediately so you can see the effect.
You can change as many or as few colors as you like. Any property you do not touch keeps its value from the base template.
Using Rotate Colors
The Rotate Colors button is a quick way to explore different color arrangements without picking colors manually. Each click cycles the color assignments across the four main shape types in this order:
Process ← Alternate Process ← Decision ← Decision Label ← (wraps back to Process)
In other words: the Process block takes the colors that were on Alternate Process; Alternate Process takes Decision's colors; Decision takes Decision Label's colors; and Decision Label takes the colors that were on Process.
Click the button multiple times to cycle through all four possible rotations. The preview images update after each click.
Step 3 — Preview the Result
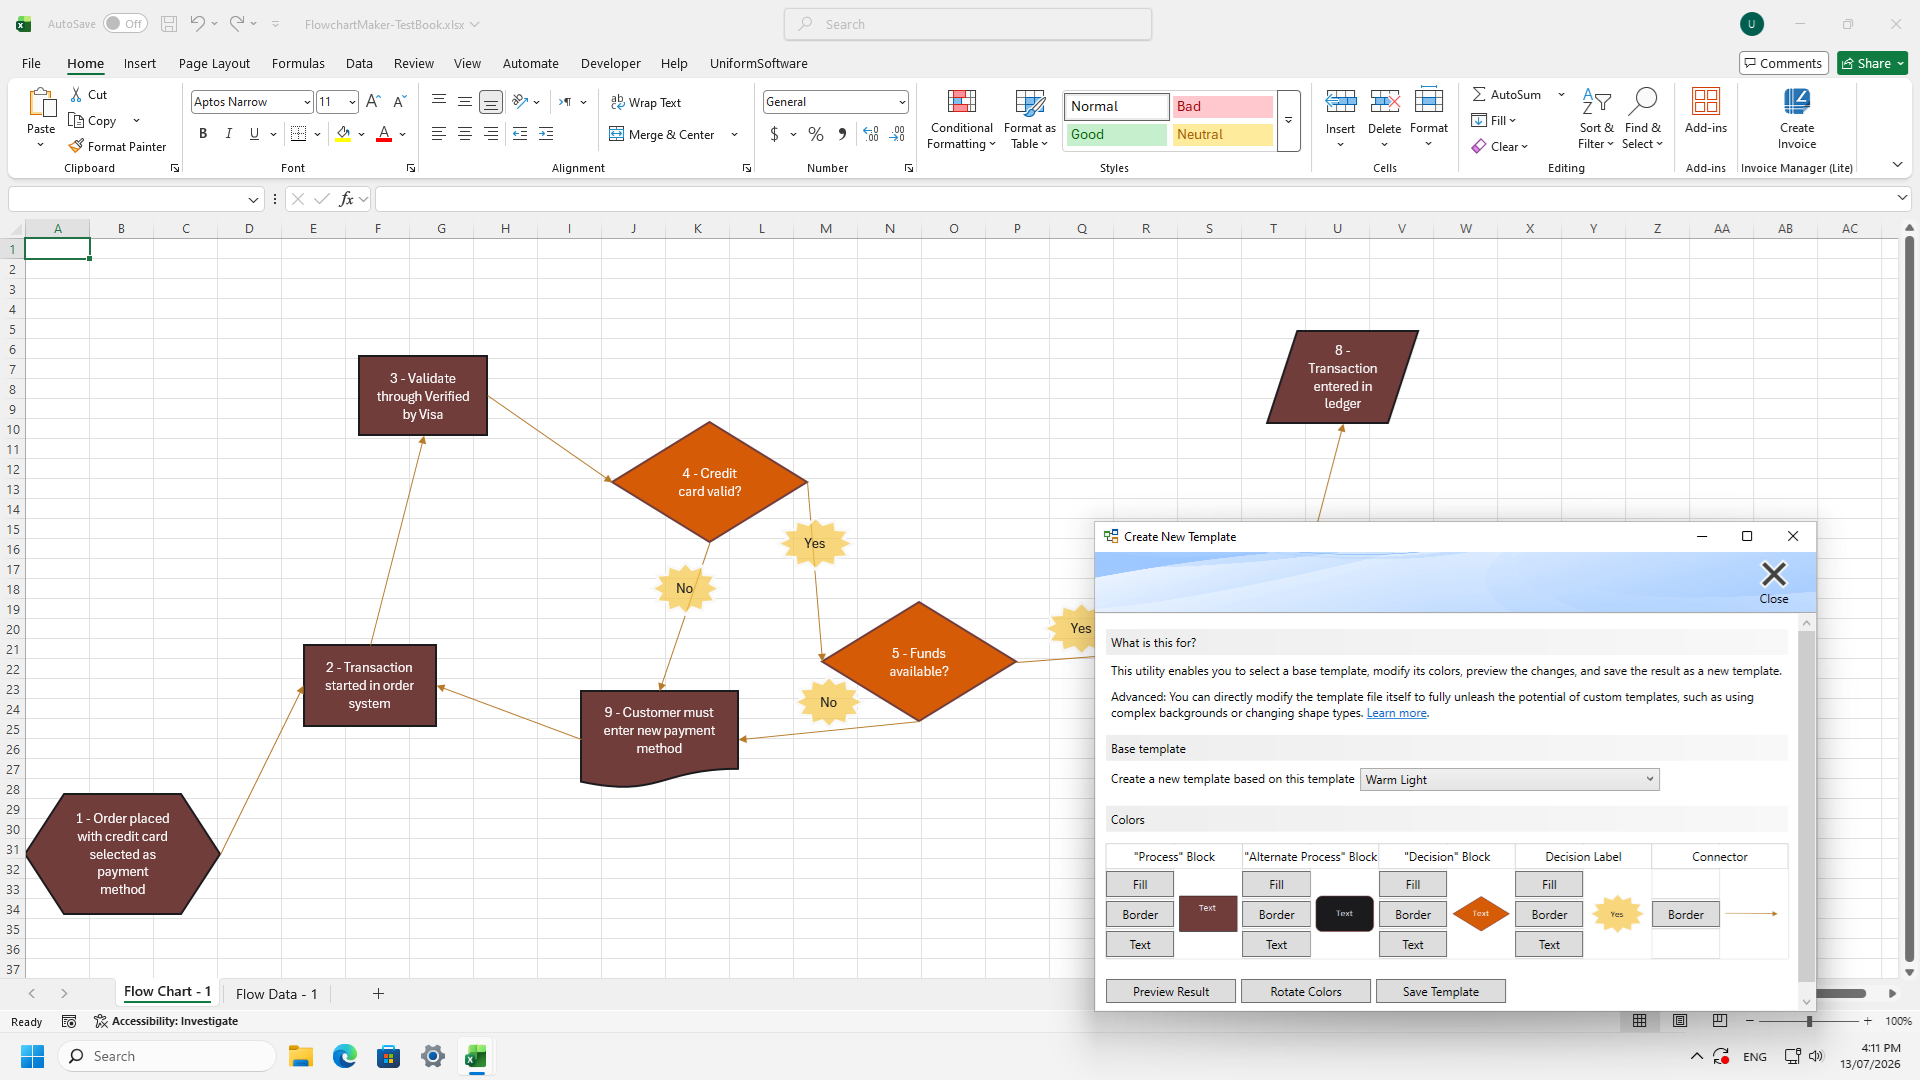
Before saving, you can see exactly how a real flowchart will look with your new colors applied.
Click Preview Result. Flowchart Maker will:
- Apply your color changes to all shape types in the template (including any additional shapes beyond the five shown in the grid).
- Generate a small test flowchart in a temporary Excel workbook using the updated template.
- Bring that workbook to the front so you can inspect the result.
You can click Preview Result as many times as you like.
Step 4 — Save the New Template
When you are happy with the colors, click Save Template.
A Save As dialog opens, already pointed at the Flowchart Maker templates folder. Type a name for your new template and click Save.
Important: You must save the file inside the templates folder that the dialog opens to. If you navigate to a different folder, you will see a reminder message and the dialog will reopen in the correct location.
Once the file is saved:
- The new template is immediately available in the Base template drop-down, selected automatically.
- The shape picker throughout Flowchart Maker is updated to show the new template's shapes.
- You can now use your new template when creating or updating any flowchart — select it from the Template drop-down on the main Flowchart Maker ribbon.
Advanced: Editing a Template File
The Create New Template utility covers the most common customization need: changing colors. It simplifies this by grouping all shapes into the five categories shown and applying your color choices consistently.
For more advanced customization — such as using gradient or pattern fills, changing shape types, or adding a custom background — you can edit a template file directly. Template files are standard Excel workbooks (.xlsx) stored in the Flowchart Maker templates folder.
Click the Learn more link inside the utility for full documentation on the flowchart template file format.
