The apps on the Microsoft Marketplace support two license management systems: Microsoft License Management and Uniform Software License Management.
Note that you cannot switch between the two licensing systems. If you want to change the licensing system, you have to cancel your existing subscription and then purchase another one.
This is due to the fact that the marketplace views apps bound to different licensing systems as two distinct apps.
The Microsoft licensing system supports only work or school accounts. The uniform software licensing system allows you to assign licenses to both personal accounts (Microsoft accounts) and work (or schoool) accounts.
"Subscription Management" means to change the number of purchased licenses or to cancel a subscription. No matter which licensing system you choose, you can always manage your subscriptions using Microsoft 365 Admin Center.
"License Management" means to assign or unassign licenses to users.
Microsoft License Management
The app editions that support Microsoft license management are available on Microsoft AppSource only, i.e., they are not available on the Azure Marketplace. These editions enable you to manage your purchased licenses using the Microsoft 365 Admin Center. You can assign or unassign licenses to users in your organization. You may like to choose this if you have already used Microsoft Admin Center.
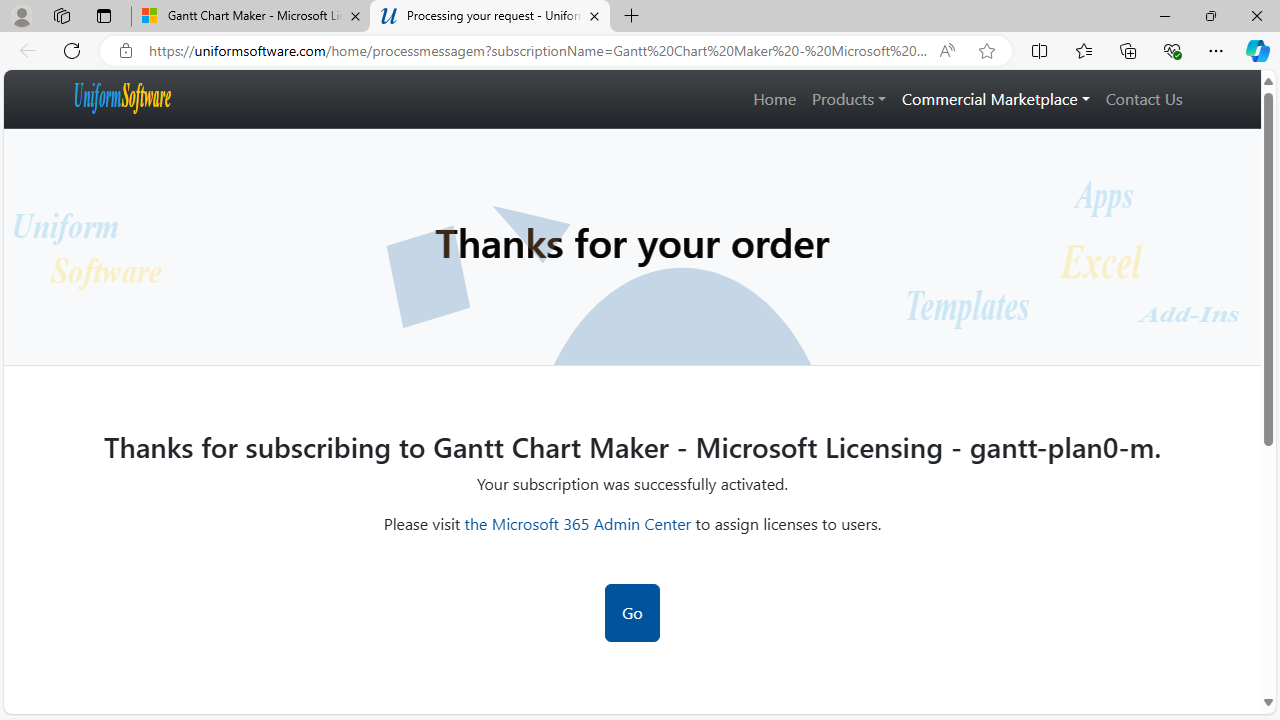
- Once you place the order via Microsoft AppSource, you click "Configure SaaS account". This redirects you to this web site (the Marketplace subscription portal) to activate the subscription. The subscription is activated automatically. You see this page.

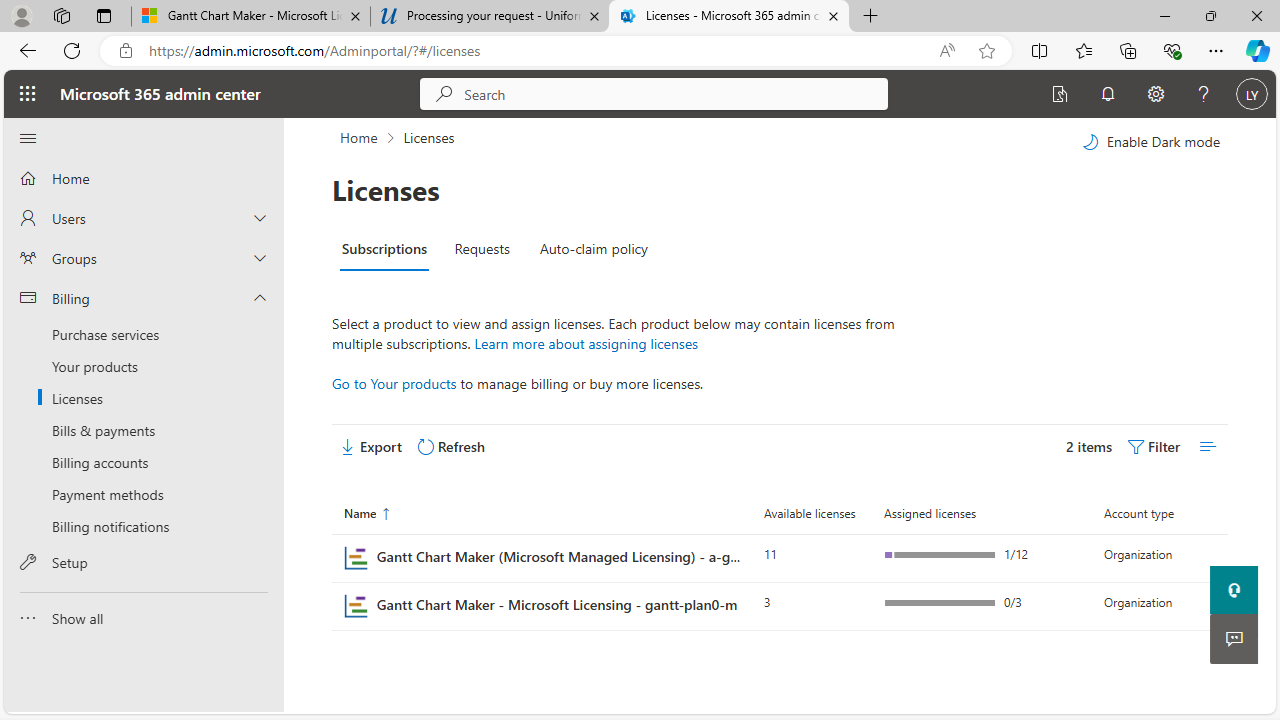
- Click "Go" to visit the Microsoft 365 Admin Center. The "Licenses" section is automatically selected. This page shows all the apps for which you can assign licenses to others.
- Click to open the app (the subscription plan). It shows a detailed page of licenses.
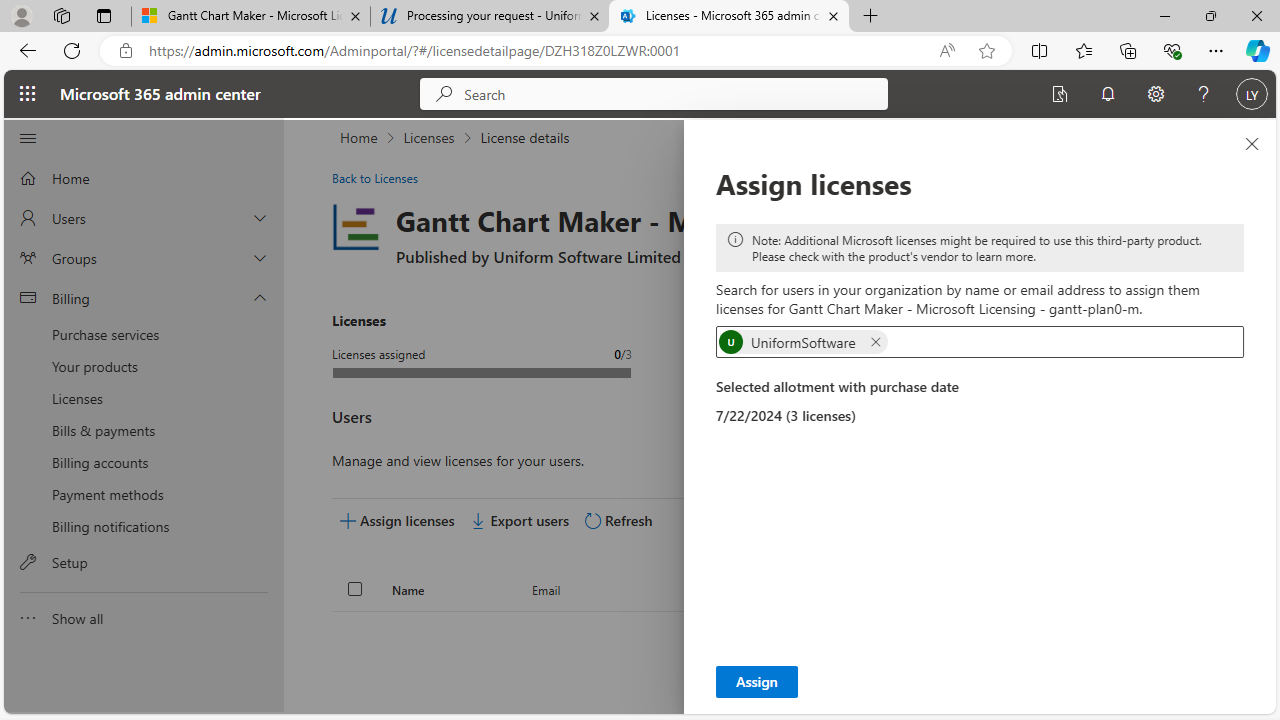
- Click "+Assign Licenses" to open the "Assign Licenses" pane.
- Now you can download and install the app. Launch it. Go to the "License / Support" tab. Click the "Change Account" button to sign in with the account that has a license assigned to it. This activates the app with the license assigned.

Uniform Software Licensing System
If you purchased one license (i.e., one user seat) and you sign in to Windows with the same purchaser account, then you don’t have to assign the license to the end-user manually.
If you purchased multiple licenses and the "First Come, First Served" option is enabled, then whenever a new end-user within your organization (i.e., within the same Azure Active Directory) runs the app, a new license is assigned automatically.
If you want to assign licenses to end-users manually, here are the steps:
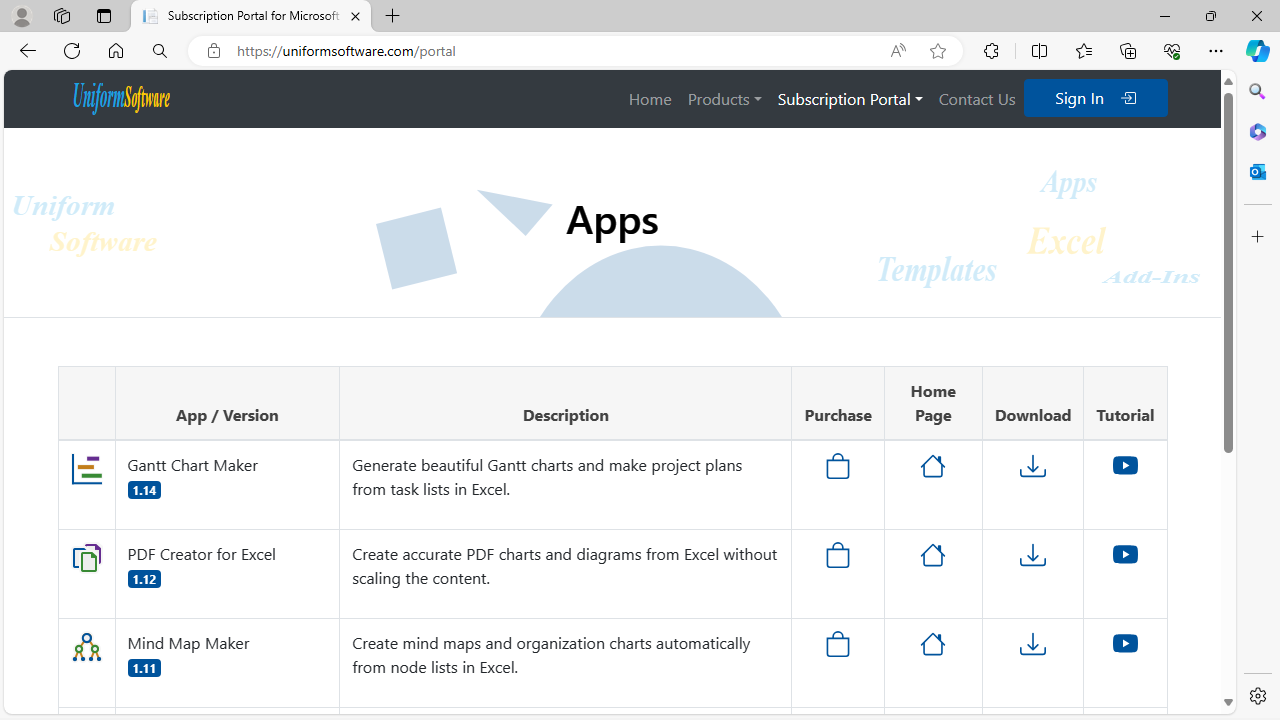
- Visit the subscription portal at https://uniformsoftware.com/portal.
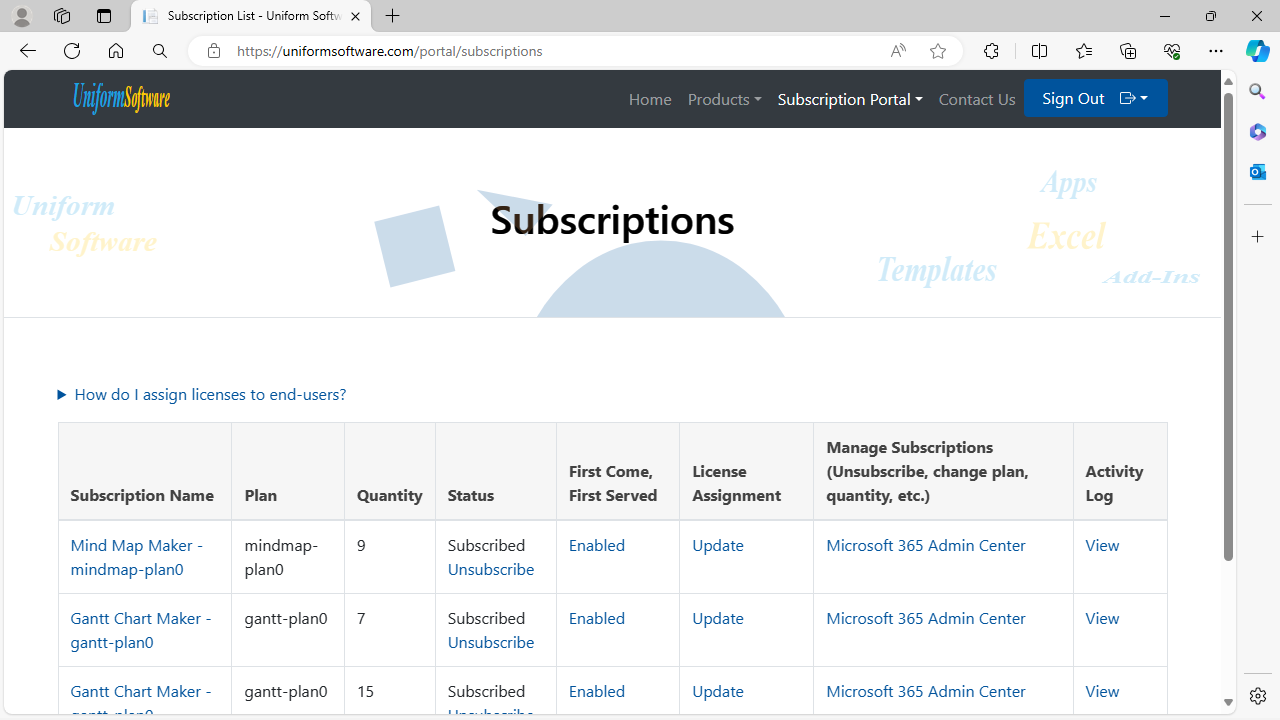
- Click "Subscriptions" on the menu bar. You’ll need to sign in with the account that made the purchase.
This page enables you to change "First Come, First Served" or change subscription plan and quantity via the "Microsoft 365 Admin Center" link.
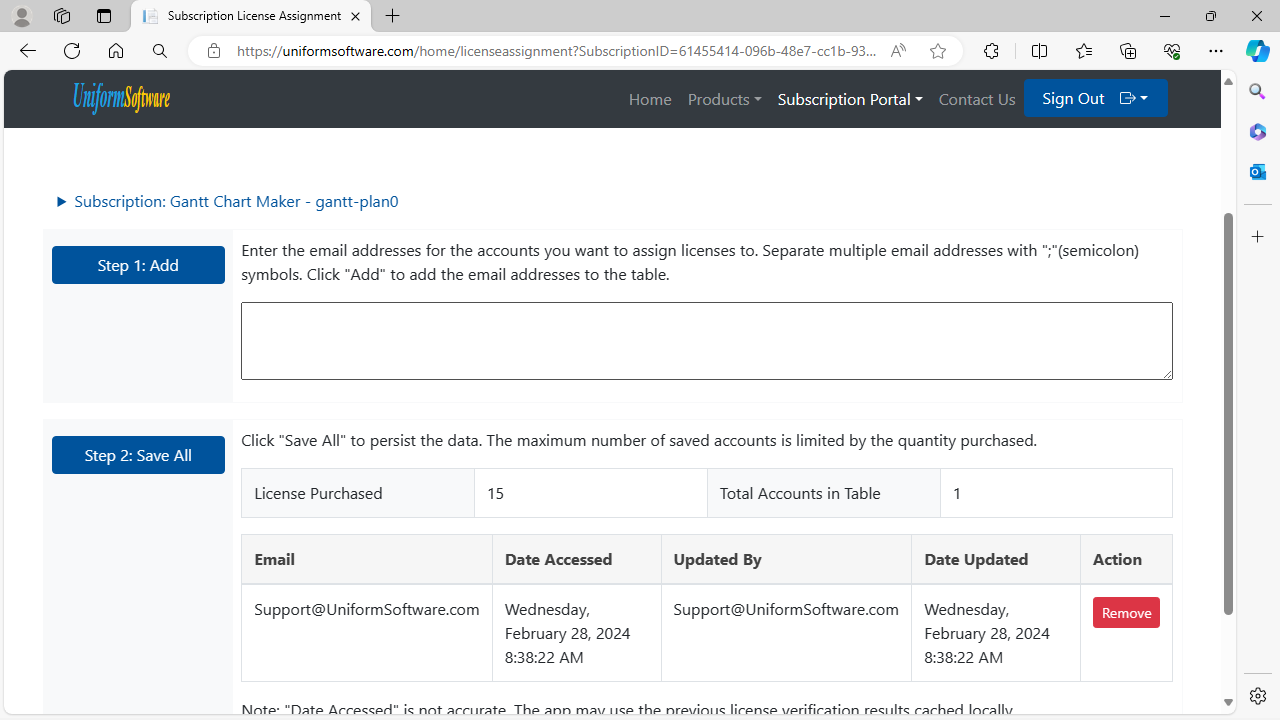
- To assign a license to users manually, click the "Update" link in the "License Assignment" column.
- To assign a license to a new end-user, fill in the email address in the text box and click "Add".
- Click "Save All".